Removing DRM from Barnes&Nobles .epub Books
January 30, 2021 Stardate: 74547.7
- Important
- These instructions are intended to be used with books that you legally purchased from B&N and are trying to backup. Don’t get me in trouble!
These instructions are adopted from Aric Renzo at https://www.aricrenzo.com/2019-12-13-Liberate-Your-Nook-Ebooks/ and are intended to fill in the gaps and/or clarify some steps for total noobs like myself. I am not smart enough to figure these out and all thanks and appreciation go to him.
I’ve rearranged the order of operations from Aric to put the most difficult (IMO) steps in the beginning. This way, if you fail there is no sense in doing the other easier steps.
- Install Android Studio and Android Studio SDK.
- Spin up a virtual android device
- Check if you have root access!
- Install B&N eReader app on the virtual device
- Log-in to the eReader and download your desired book
- Go into root shell and pull out the book and encryption hash
- Install Calibre
- Install DeDRM plug-in for Calibre
- Remove DRM from book
Step 1. Install Android Studio and Android Studio SDK
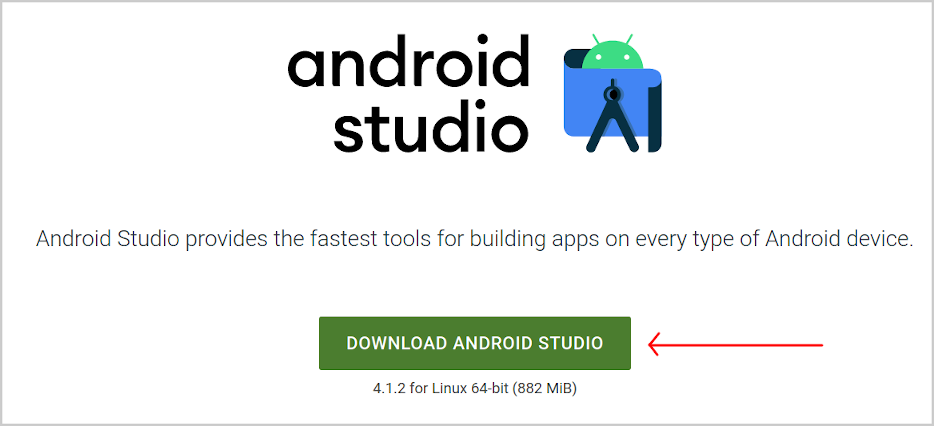
- Download the .zip package for Android Studio for Linux. Save it somewhere like in your Downloads directory. At the time of writing I downloaded version 201.7042882.
- It’s generally a good practice to verify the checksum. Scroll down to the download area to find it. This was mine.
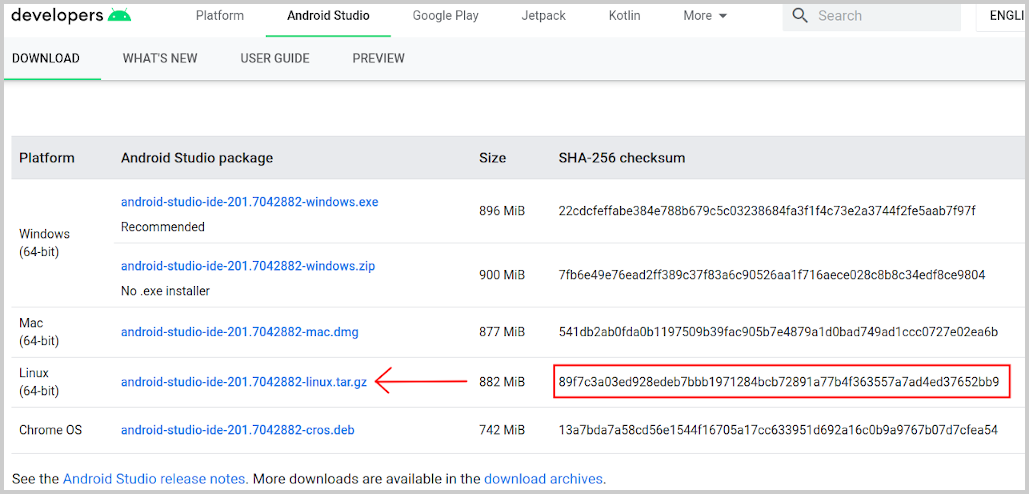
I usually just look at the last 4-5 digits to verify.
- cd into directory where the download is
sha256sum <filename>- Compare the last 4-5 digits against the sha provided from the source

- You can follow the installation instructions here – https://developer.android.com/studio/install#Linux.
- Copy the .tar.gz file into
/usr/local/directory - Uncompress it
Remember you will need root access to be messing around in /usr/local 
- If you are running 64-bit linux you will need to install some 32-bit libraries to make it work well. At least according to the instructions.
sudo apt-get install libc6:i386 libncurses5:i386 libstdc++6:i386 lib32z1 libbz2-1.0:i386How do you know if you are running 64-bit? Type
uname -iand if you seex86-64you are.Let’s fire it up! Within
/usr/local/andoroid-studio/bintype./studio.sh.

Step 2. Spin up a virtual android device
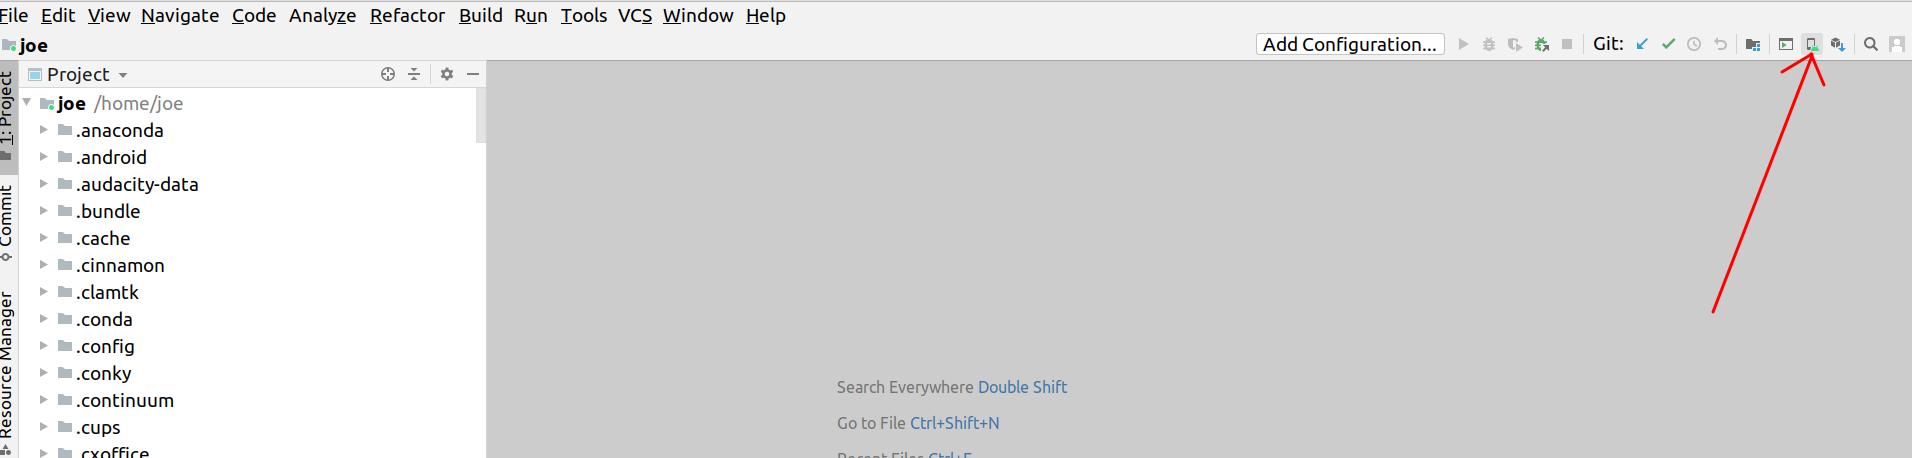
- Start AVD Manager by clicking on the little phone icon in the far upper-right.
- Next you need a virtual device. I am a total idiot in this area. I have no experience with Android development. But I can tell you that you must have root-access on the device you create, and in order to allow root access you must not use a Google Play image. So what does that mean? That means do not use an image that has the Google Play icon, like this (A).
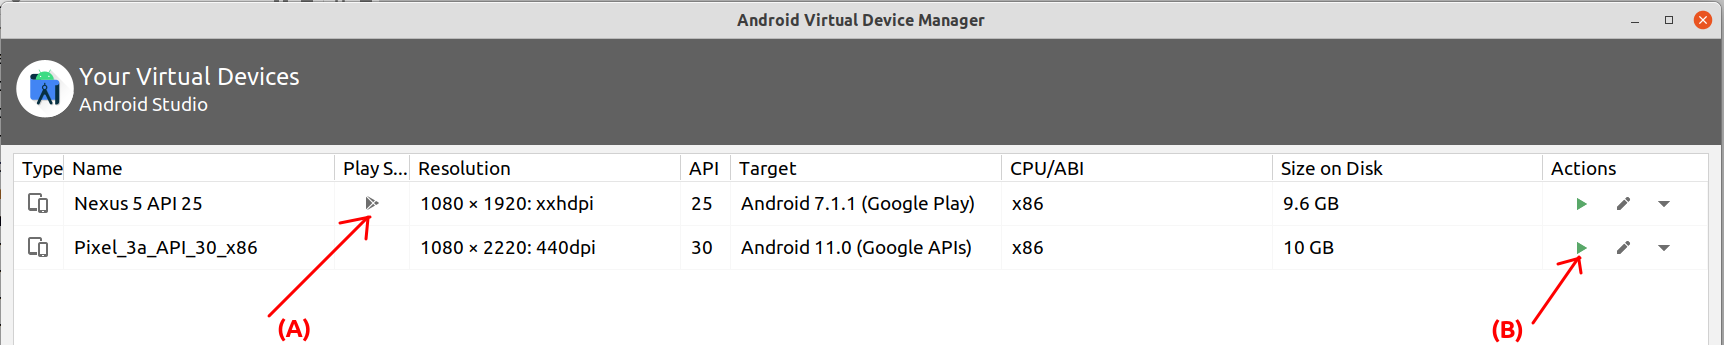
- You can create your own image as others have done, but I just used the
Pixel_3a_API_30_x86that was present when I started AVD Manager. - To start the image click the green “play” triangle (B).
- Warning
- You a need a virtual device that is not a Google Play image so that you can access root. This is critical.
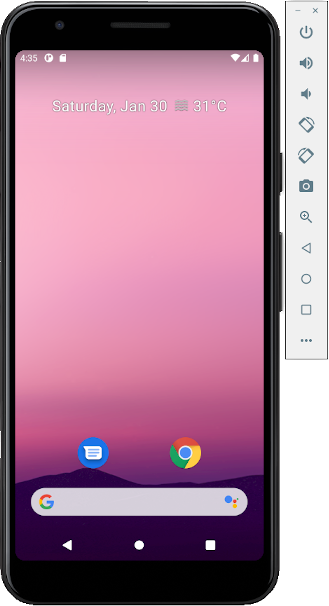
A phone will appear and after a couple seconds it will “boot up”. Here’s mine:
Step 3. Check if you have root access
If you don’t have root access you did something wrong and there is no point in continuing, so let’s check now.
Open a terminal screen. When you install Android Studio it created an “Android” directory in your home folder. Go there and browser in
~/Android/Sdk/platform-tools.You should see a command named
adb.Type
./adb rootand you should see something likerestarting adbd as root. If you do not, you are screwed. Go back and figure out what you did wrong. The primary source is that whole “Not a Google Play image thing”.Now we can get inside the virtual device,
./adb shell. Your cursor should be a pound “#” indicating you are root.If you are not root, you can’t go into all the necessary directory folders.

Keep this terminal around, we’ll need it later.
Step 4. Install B&N eReader app on the virtual device
In your virtual device, open the Chrome browser. Just navigate with your mouse.
Copy this url
https://apkpure.com/nook-read-ebooks-magazines/bn.ereader/versionsand paste into the Chrome browser.
- Left-click in the web address box
- Press and hold left mouse for a second, just like you would do on your mobile phone
- Select the “paste” option
- Press enter on your desktop keyboard
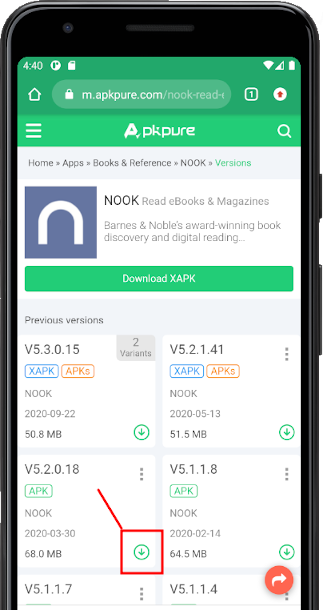
- Download an .apk of the B&N Reader app
- Again honesty… I don’t know the difference of capabilities or restrictions between all the different versions. I can say that I used
V5.2.0.18so you might as well do the same.
- I got an ad, so close the ad by pressing the “X”. You typically get warnings when installing apps outside of the Google Store, so you will probably get a warning like this:
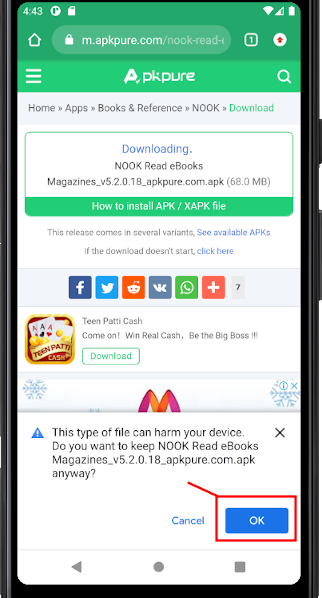
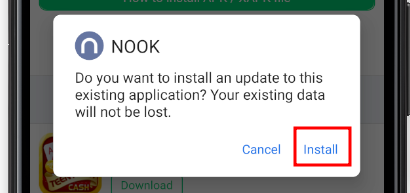
- Install the app
- Open the app
Step 5. Log-in to the eReader and download your desired book
It will ask you to log-in with your username/password. I didn’t take any screenshots of these steps, but it is typical app setup junk.
Then it may ask for credit card information if you don’t already have it setup in your B&N account –like I did not. you can skip this section by scrolling to the bottom of the screen and hitting “Skip”.
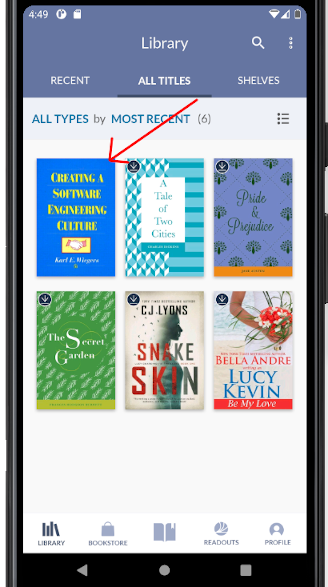
Give it a minute and it will download your library. Somewhere it said you can also pull-up on the screen to make it refresh. Here’s what mine looked like. It included the purchased book (upper left) and 5 other free books that I didn’t ask for.
- Now you have to download your book onto your virtual device. I used this method on two different books, and for both all I did was open the book inside the device and the app downloaded the entire
.epub. I instructions on the web about selectingDownload to SD Cardin the settings and such, but I didn’t have to do that. - OK, we should be done with the virtual device now. But don’t shut it down because we need to go inside the shell and pull out the book you just downloaded.
Step 6. Go into root shell and pull out the book and encryption hash
Go back to the terminal screen where you opened the shell.
Now we need to find that book file we just downloaded. I noticed that the B&N books appear to be in the format
123456789_epub.Vx.epub. That is, a bunch of numbers + _epub+a version number+.epub extension.I found the downloaded book at `/data/data/bn.ereader/files/B&N Downloads/Books/

To copy a file from the virtual device to desktop you have to “pull” it from back in the terminal - not the ADB shell.
- Since you are not in the shell you cannot tab-complete the file dirs/filename so I suggest copy/pasting the directory path and then copy/pasting the file name.
- Also, don’t forget to escape the “&” and space characters.
- See the example below.

- Now let’s go get the encryption hash. It’s stored in a database named
cchashdata.db. Search for it inside the ADB shell but I would bet it’s in the same directory as where you found the file =./adb pull /data/data/bn.ereader/databases/cchashdata.db
- Files will be in the current directory

- Find the hash and save it as a keyfile.
- Type
sqlite3 cchashdata.db - This opens a SQLite shell. Look inside a specific table, type
select hash from cc_hash_data; - You’ll get a HashKey, copy that INCLUDING THE TRAILING EQUAL SIGN. Here’s mine, don’t worry, I obfuscated a bunch of the letters.

- Open a new file and save it somewhere with a .b64 extension, like “MyHash.b64”.
- To exit the SQLite shell press Ctrl-Z
- To exit the ADB shell press Crtl-D
- Note that this hashkey is good for all books purchased at B&N by that account.
Step 7. Install Calibre
- This is pretty straight forward so I’ll breeze through this part. I installed version 4.99.4 as that what was in the repository. At the time of writing version 5.10.1 was available as binary install.
- Note that the plugin DeDRM version must be applicable for the correct Calibre version. DeDRM v6.x = Calibre 4.x and DeDRM v7.x = Calibre 5.x so keep that in mind and look at the release notes.
- Install the latest directly from Calibre
sudo apt update && sudo apt install -y libfontconfig libgl1-mesa-glx
bash sudo -v && wget -nv -O- https://download.calibre-ebook.com/linux-installer.sh | sudo sh /dev/stdin
Install via Software Center
Install via apt-get
sudo apt-get update
sudo apt-get install calibre- I chose the first option and installed directly from Calibre. So if you do something other than that “buyer beware”.
Step 8. Install DeDRM plug-in for Calibre
Open browser and go to DeDRM github page at https://github.com/apprenticeharper/DeDRM_tools/releases
Download the plugin .zip package. I chose to download the latest pre-release at the time (v7.0.3). Just click the zip link in the “Assets” subsection and save.
- You need the zip package named “DeDRM_plugin_x.x.x.zip”
- It appears that if you download a pre-release it is just that plugin folder, so don’t unzip it.
- If you download a normal release it will say something like “DeDRM_tools_x.x.x.zip”. In which case unzip it and you will find the “DeDRM_plugin.zip” inside
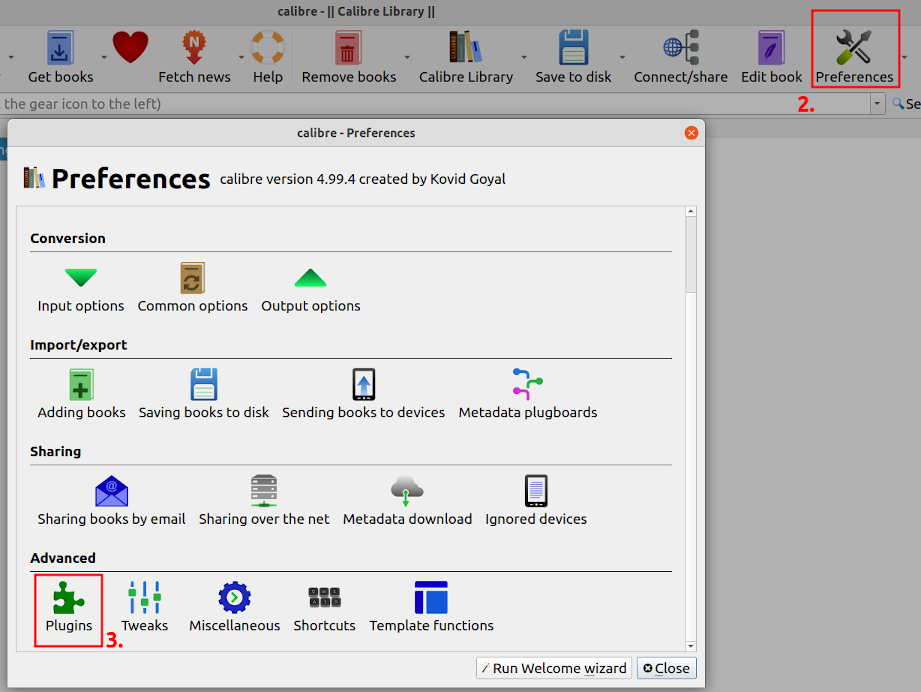
Open Calibre
Click the Preference icon in the tool bar
Scroll down to Advanced and click Plugins
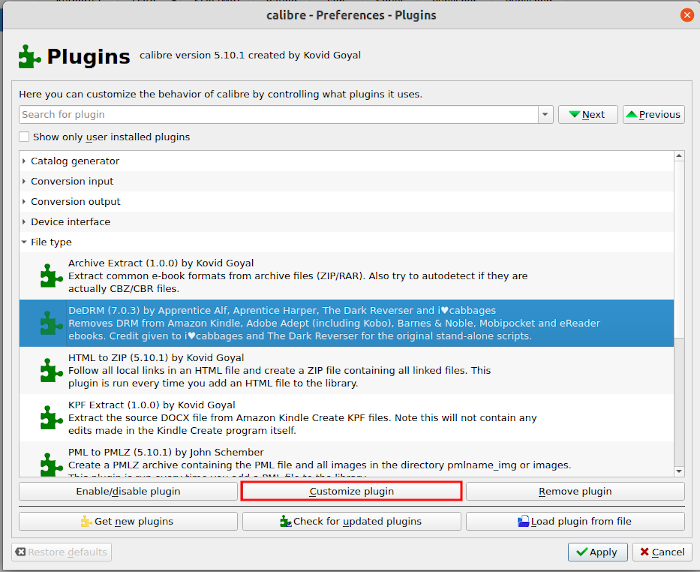
Click “Load plugin from file”
Select the
DeDRM_plugin.zipzip package you saved. Click yes and ok to everything.Back in the Plugins dialog, select “File type” and select “DeDRM”, click the button “Customize plugin”
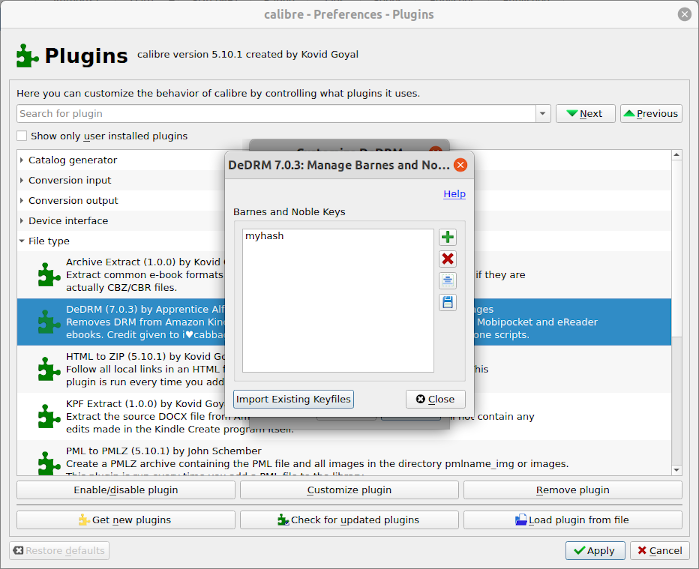
Select “Barnes and Noble ebooks”
Select “Import Existing Keyfiles”
Browse and select the keyfile you saved, something like
MyHash.b64
Step 9. Remove DRM from book
At this point, you can add your book that you downloaded from the virtual device. Remember in my example it was
9780133489293_epub.v2.epub. WIihin Calibre select “Add books”Browse to and select the epub. Select OK
If you double-click the book to open it and get an error message stating you have DRM then something went wrong.
You can go post a message to the DeDRM forum along with a log file. They are very helpful. Here are instructions on creating a debug log.
Conclusion
The goal of this post was to add clarifications to Aric Renzo’s excellent instructions based on what worked for me. These instructions are not for Windows but could probably be adjusted to make work. I’m positive there are other methods of making this work. If there are any mistakes to these instructions feel free to hit me up on twitter.
Software Versions
This is an automated list of software versions used during the writing of this article.
Software Version Ubuntu 20.04.1 Calibre 5.10.1 Android Studio 4.1.2 B&N Reader App .apk 5.2.0.18 DeDRM Calibre Plugin 5.10.1